
DIY Tips: Preparing Your Vehicle for ADAS Calibration
Understanding ADAS Calibration
Advanced Driver Assistance Systems (ADAS) are becoming increasingly common in modern vehicles, offering features like lane departure warnings, adaptive cruise control, and automatic braking. To ensure these systems function correctly, they often require precise calibration. Proper calibration is crucial for safety and optimal performance.
Before diving into the calibration process, it's important to understand that ADAS calibration is not a simple task. It involves adjusting the vehicle's sensors and cameras to ensure they are in perfect alignment. While some adjustments can be done at home, others may require professional expertise.
Preparing Your Vehicle
Before you start the calibration process, make sure your vehicle is in optimal condition. Begin by checking the tire pressure. Uneven tire pressure can affect the vehicle's alignment, which in turn can impact ADAS calibration. Ensure all tires are inflated to the manufacturer’s recommended levels.
Next, inspect the vehicle's suspension system. Worn or damaged suspension components can lead to misalignment and incorrect calibration. If you notice any issues, address them before proceeding with calibration.
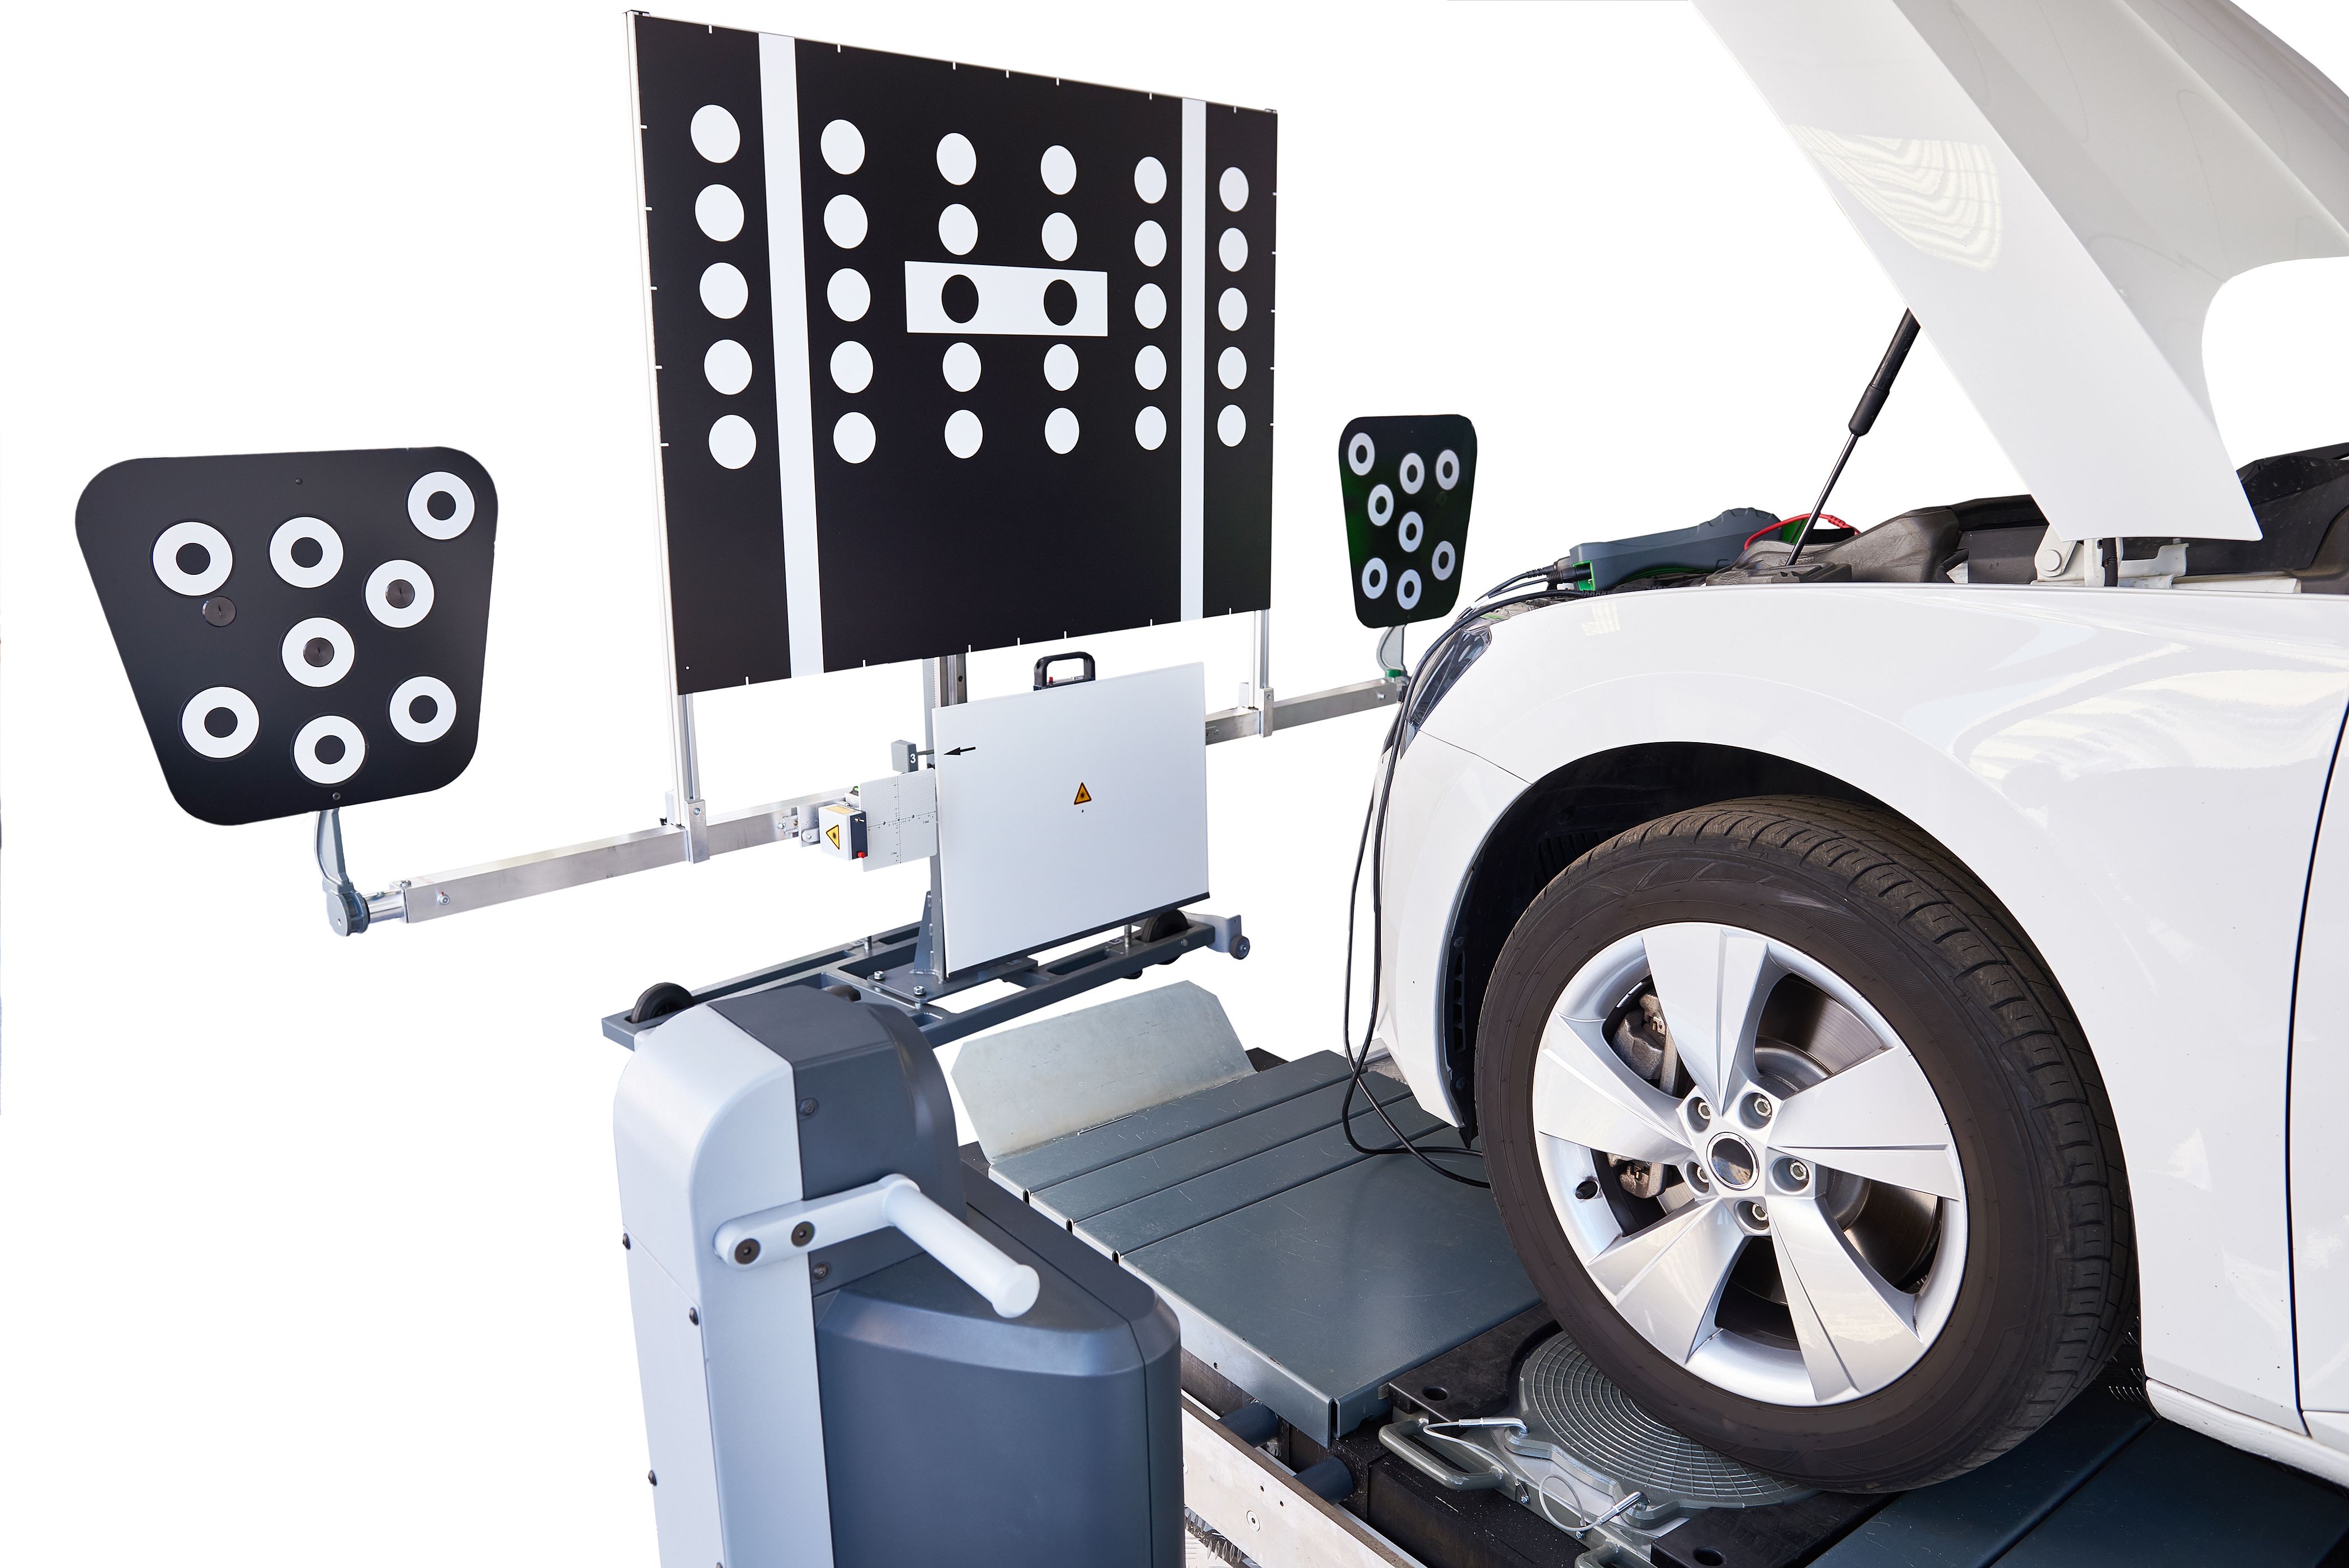
Tools You Will Need
For a DIY approach to ADAS calibration, gather the necessary tools. The basic tools include:
- A level surface for parking the vehicle
- A calibration tool or scanner compatible with your vehicle's make and model
- A tape measure for precise measurements

Calibration Process
Once your vehicle is ready, park it on a level surface. This ensures that the sensors are calibrated in a stable environment. Position your calibration tool according to the manufacturer's instructions. These tools often come with specific guidelines for different vehicles.
With the tool in place, use a tape measure to verify the distance between the sensors and the ground. Ensure the settings on your tool match the specifications provided by your vehicle's manufacturer. This step is critical for accurate calibration.
Performing the Calibration
Turn on your vehicle and follow the instructions provided by the calibration tool. This usually involves running a series of tests to align the sensors correctly. Be patient during this process, as precise calibration is key to the effective functioning of ADAS features.

Final Checks
After completing the calibration, take your vehicle for a test drive. Pay attention to the ADAS features and ensure they are responding as expected. If you notice any discrepancies, you may need to repeat the calibration process or seek professional assistance.
Remember, while DIY calibration is possible, some vehicles and systems may require specialized tools or expertise. If you ever feel uncertain, don't hesitate to consult with a professional to ensure your safety and the reliability of your vehicle's ADAS features.